


WordPress installation – this is how it’s done!
Whether for commercial or private use: nowadays, an own web presence is the best way to reach as many people as possible for your goals.
suitable service providers deliver fast, target group-oriented and professional results. But not everyone can or wants to invest in the professional development of their own website. Therefore, those who would like to take over the concrete implementation on their own, at least at the beginning, are faced with a great challenge without existing knowledge and experience. But the construction of simple websites using the program WordPress is no witchcraft and requires only a few steps to achieve first successful results.
WordPress installation
Before the first projects can be tackled, three basic components are required for a successful WordPress installation:
- The latest version of WordPress comes in a compressed ZIP file format and must be unpacked with a suitable program;
- An FTP program such as FileZilla allows access to FTP servers and the transfer of data;
- And last but not least an own web address together with a sufficient amount of web space.
If all three conditions are met, the installation of WordPress and the subsequent development of initial content can already be started.
To do this, the file “wp-config-sample.php” in the unzipped WordPress folder must first be opened using a suitable text editor. As the name already indicates, this is a sample file which must be supplemented with the SQL access data received from the web host in the places provided and marked for this purpose.
WordPress config-sample file
The relevant passages are highlighted in green letters in the document, and annotations are highlighted in violet. The necessary data includes the name of the database used, the user name of the database, the password and, if necessary, the database host.
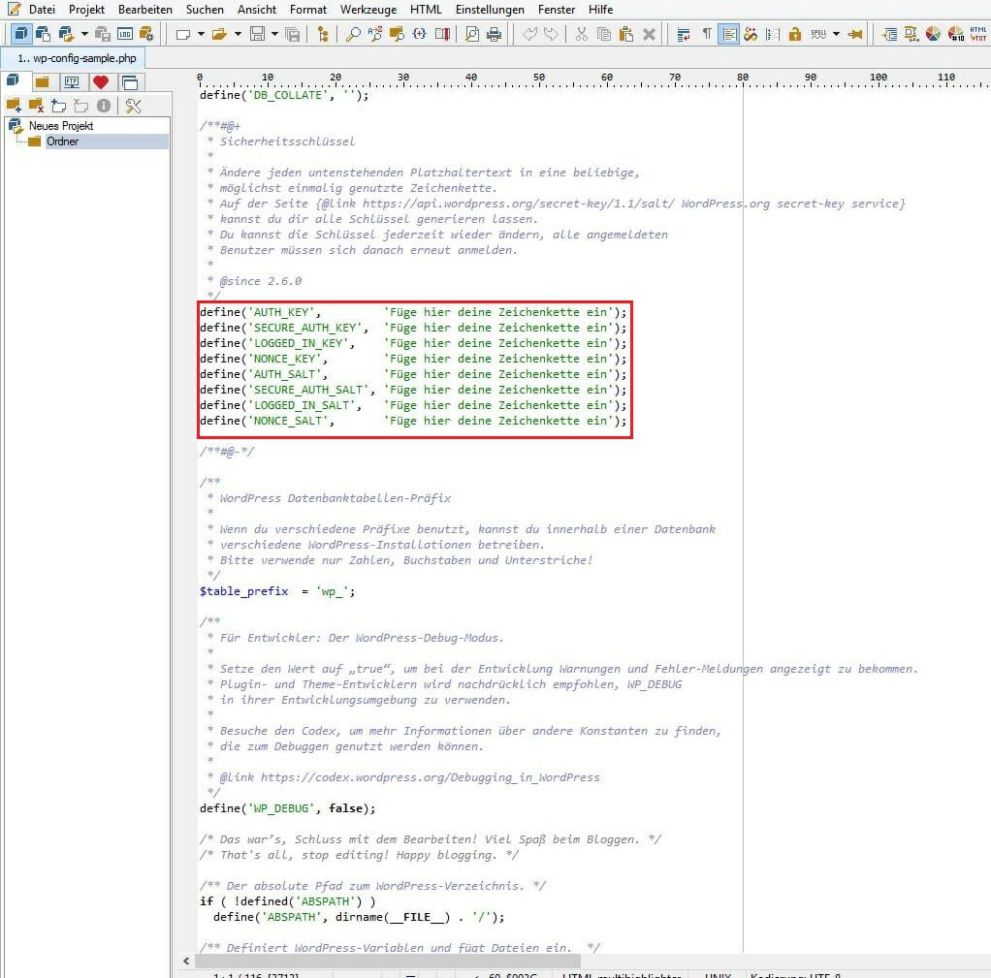
WordPress Security Key
Finally, individual security keys must be entered here, which can be generated easily via WorPress’ Secret Key Generator.
Once all necessary data have been transferred, they are saved in the WordPRess folder under the name “wp-config.php“. If the config file is successfully completed, a connection to the server is established in the FTP program with the existing data (server, user name, password, port). After a successful connection has been established, all data available in the WordPress folder must be uploaded to the selected server (mark it, then either simply drag and drop it into the right-hand box or right-click – upload).
If you now call up your own website with the addition “/wp-admin/install.php“, only a few details have to be entered before WordPress is successfully installed and nothing stands in the way of your own web presence!


Comments