

Writing a blog post is one of the absolute WordPress basics and one of the first things that WordPress newbies should be concerned with. In this article we will not only show you how to create a blog post, but also explain the most important features of the text editor.
After we have discussed the differences between WordPress posts and pages, it is time to turn our attention to the creation of the first post. post with WordPress, images, images, integrated, and publish this . In the second part, we will go deeper into the matter. Because the WordPress Editor offers numerous other extras that will be examined in more detail. These include the Add of categories, the Create an excerpt, the Add a post picture and so on.
Update 31/12/2017: In the meantime we have written a detailed article about the functions of the WordPress editor.
Create article with WordPress
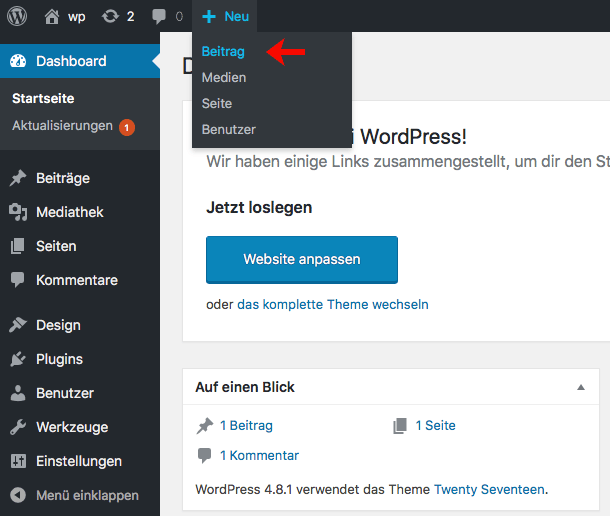
To create a post with WordPress, we first log into the backend of our website. Then we hover with our mouse over the +New button and click on post.
We are then directed to the post editor, where we can create and publish our post. I have marked the most important elements for you and will go into more detail below.
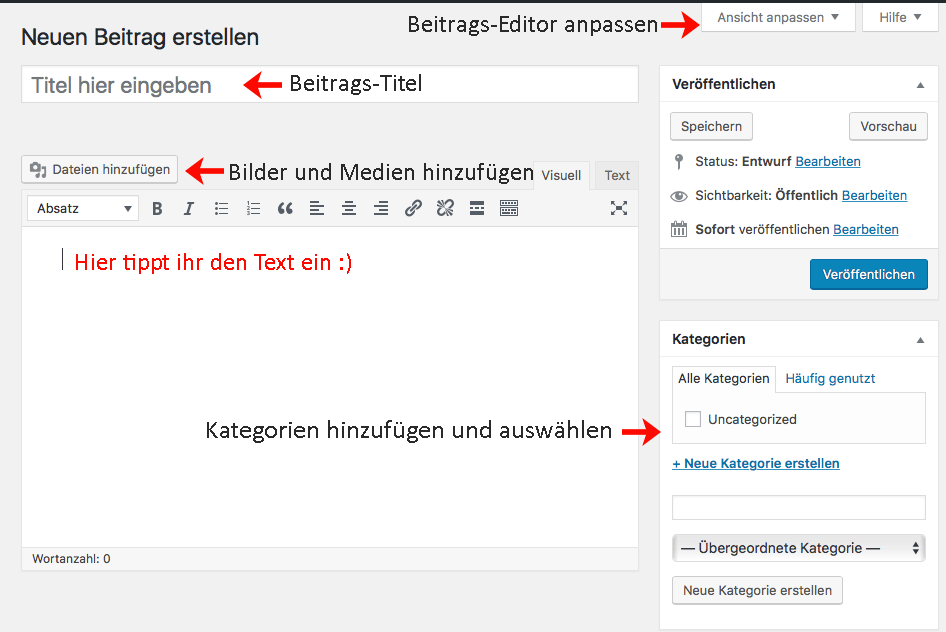
Add the blog title
The post title is the title of your post. It should convey to the reader what your article is about. A good title should contain meaningful keywords and be particularly tempting for the reader. On the one hand, this can increase the click rate and on the other hand it can be beneficial for the position in the search results of Google and Co. In addition, the title should remain within the range of 50 characters so that it is fully displayed in the search engine results. If you want to know more about search engine optimization, we recommend our guide to search engine optimization with WordPress.
Add the content of the article
A good title can be beneficial for the click rate of a post. It is equally important that the content is correct. WordPress makes the process of entering content relatively simple. Just click in the text area and start typing. The WordPress editor provides you with two views: Visual and Text. You can switch between the views by clicking on the tabs of the editor.
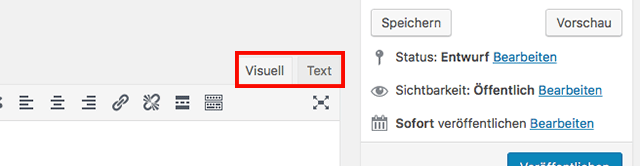
The Text tab displays the underlying HTML. All content is generated as HTML code, even if you use the visual editor. This can be useful in many cases if you are familiar with HTML. Of course not all users do this, which is why the Visual tab was created. Here the content is displayed as it will be seen by your visitors. This means that you can work here without having any knowledge of HTML.
Add images and media
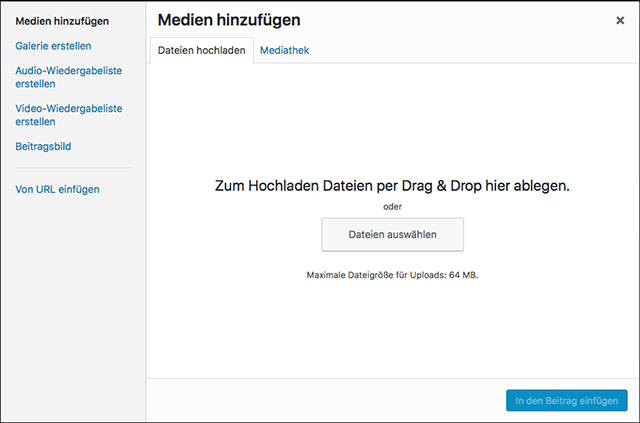
Between the two content fields just described, you will find the button Add Files. With this function we can add images or other media like audio or video. Clicking on the button opens the file uploader. You can simply drag the files into the window to upload them to WordPress.
Add categories
If you want to run a blog with WordPress, you will be especially interested in the categorization of your posts. Not only will your readers find what they’re looking for more easily, but search engines will also have a better idea of what visitors are looking for on your site. This also gives you the opportunity to include articles from the respective categories. For example, on the home page you can only display articles from the category “long-distance travel”.

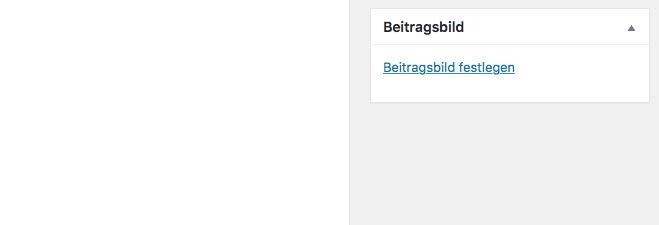
Define contribution picture
You also have the possibility to define a contribution picture for your mail. To do so, click on “Set post image” in the right sidebar and select an image that matches your article.
The added image will then appear above your text and also when you have the post displayed as an excerpt. The image will also be included when you share your post on social media.
Publishing a contribution with WordPress
On the right side you will find a box with different publishing options. Before you finally put your post online, you can preview your work by clicking the “Preview” button. This option allows you to view your post as your readers will see it. Click on the preview, button to open the post in a new tab.
Once you are satisfied with your post, you can click on “Publish” to make the final version available on your website. Only now can visitors to your site see and read the article.
Any more questions? Suggestions for improvement or suggestions for further articles? Then write it in the comments.

Comments